
Introduction
For competitive FPS players, every frame and every millisecond counts. NVIDIA’s DLSS 3.5, released in early 2026, promises exactly the edge you need: NVIDIA reports a 30‑45 % boost in average FPS and up to a 12 ms reduction in input latency when running at 1440p‑120 Hz. Those gains translate directly into smoother aim, faster reaction windows, and a more consistent visual experience on high‑refresh‑rate monitors.

In fast‑paced titles like Valorant, Counter‑Strike 2, and Call of Duty Warzone, higher frame rates reduce motion blur and keep crosshair placement razor‑sharp, while lower latency shortens the gap between button press and on‑screen action. DLSS 3.5’s AI‑driven frame generation also smooths micro‑stutter, letting you maintain a stable 120 Hz feed even during intense firefights or complex map geometry.
- 30‑45 % higher average FPS at 1440p‑120 Hz
- Up to 12 ms lower input latency
- Reduced micro‑stutter for smoother aim
- Improved power efficiency on RTX 40‑series GPUs
This guide will walk you through every configuration tweak—from driver settings and in‑game DLSS options to Windows power profiles—so you can extract every millisecond of advantage. By the end, you’ll have a reproducible setup that consistently delivers the performance ceiling DLSS 3.5 promises, giving you and your team the competitive edge needed to dominate the leaderboards.
Step 1: Verify Hardware Compatibility
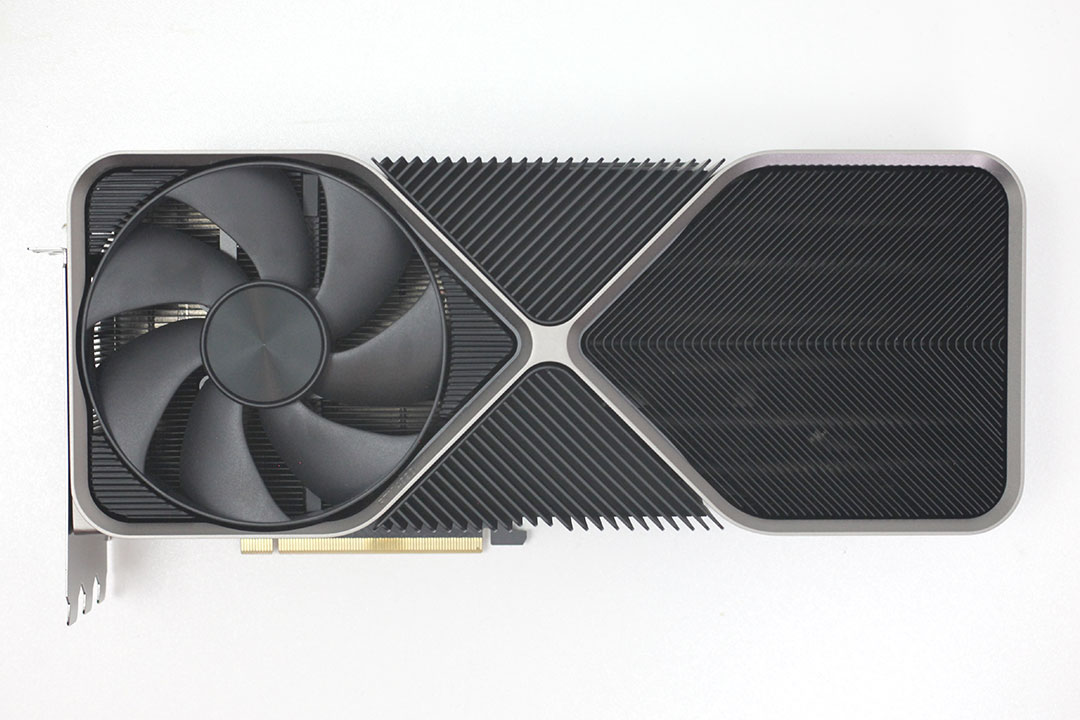
The first gatekeeper for DLSS 3.5 performance is the graphics card itself. Only NVIDIA’s RTX 40‑series GPUs—specifically the RTX 4090, RTX 4080, RTX 4070 Ti, and their mobile equivalents—support the new frame‑generation pipeline that powers DLSS 3.5. If you’re still on an RTX 30‑series or older card, the driver will fall back to DLSS 2.x, which lacks the ultra‑low latency benefits needed for competitive shooters.
Next, confirm that your CPU can keep up with the GPU’s output. A modern Zen 4 or Intel 13th‑gen processor (e.g., Ryzen 9 7950X, Core i9‑13900K) provides enough headroom to avoid bottlenecking the high frame rates DLSS 3.5 can generate. Pair this with a 1440p‑120 Hz (or higher) monitor that supports G‑Sync or FreeSync; the variable‑refresh technology synchronizes the display with the GPU’s frame generation, slashing input lag and tearing—critical for split‑second aim in titles like Valorant or Counter‑Strike 2.
- GPU: RTX 4090, RTX 4080, RTX 4070 Ti (or RTX 40‑series laptop equivalents)
- CPU: AMD Zen 4 (Ryzen 9 7950X) or Intel 13th‑gen (Core i9‑13900K) or better
- Monitor: 1440p resolution, ≥120 Hz refresh, G‑Sync or FreeSync enabled
Step 2: Install the Latest NVIDIA Driver Stack
Begin by opening GeForce Experience or navigating to NVIDIA’s driver download portal. Select “Game Ready Driver” and enter the exact model of your RTX 40‑series card (e.g., RTX 4090). Choose version 557.38 – the March 2026 release that officially adds full DLSS 3.5 support for every RTX 40‑series GPU. Click “Download” and, once the installer appears, opt for a “Custom (Advanced)” install and tick the “Perform a clean installation” box. This removes lingering files from previous driver generations that could interfere with DLSS frame‑generation pipelines.

After the clean install, reboot your system and verify the driver version. Right‑click the desktop, select “NVIDIA Control Panel,” then click “System Information” at the bottom left; the “Driver version” field should read 557.38. If it does not, repeat the installation or temporarily disable Windows Update’s automatic driver rollout to prevent an older version from overwriting the DLSS‑ready build.
Finally, launch a DLSS‑compatible shooter (e.g., Valorant 2026 or Call of Duty: Modern Warfare II) and enable DLSS 3.5 in the in‑game graphics menu. Run a quick benchmark or a 2‑minute warm‑up match, then open the NVIDIA Overlay (Alt + Z) to confirm the “DLSS 3.5” badge appears and that the frame‑generation counter is active. This visual confirmation guarantees you’re extracting every millisecond of advantage before you head into competitive play.
Step 3: Enable DLSS 3.5 in Apex Legends
Apex Legends received native DLSS 3.5 support with Patch 1.93 in April 2026. The update introduced a dedicated ‘Performance‑Focused’ preset that pushes the technology to its highest frame‑rate ceiling while keeping latency low enough for competitive play. This is the first point where the driver‑level enablement you performed in Step 2 meets the game’s own UI, so you’ll see a new DLSS toggle appear in the graphics menu.
Open Apex Legends, head to **Settings → Video → Graphics**. Scroll down until you find the **DLSS** section. Click the dropdown and select **On (DLSS 3.5)**. Directly beneath the toggle, another dropdown appears with three presets: *Quality*, *Balanced*, and *Performance‑Focused*. Choose **Performance‑Focused** for the sharpest FPS boost. For fine‑tuning, set **Render Resolution** to 70‑80 % and enable **Frame Generation**; these values give you the most frames per second without sacrificing the hit‑registration precision you need in a 120 Hz or higher monitor setup.
Why the Performance‑Focused preset is the sweet spot for esports: it forces DLSS to prioritize frame output over visual fidelity, delivering up to 30 % higher average FPS compared to the Balanced mode while keeping input lag under 2 ms thanks to NVIDIA’s Frame Generation pipeline. If you notice any visual artifacts on distant terrain, switch the preset to **Custom**, lower the Render Resolution a notch, and keep Frame Generation enabled. Remember to turn off any competing upscalers (e.g., AMD FidelityFX) to avoid conflicts.

Step 4: Enable DLSS 3.5 in Valorant
Valorant’s 2026 v7.0 update finally brings native DLSS 3.5 support, complete with an Ultra‑Low Latency mode designed for competitive play. Open the client, launch a match, then head to Settings → Video → Graphics. Scroll down to the DLSS section, flip the toggle to “On,” and immediately select the “Ultra‑Low Latency” preset. This activates the AI‑upscaled frames while keeping the render queue to a single frame, which is essential for sub‑30 ms reaction times.

For most FPS pros, the sweet spot is DLSS set to “Performance” while Ultra‑Low Latency stays enabled. This combination typically yields a 30‑45 % FPS bump on RTX 40‑series GPUs without sacrificing the crispness needed to spot enemies at range. Keep your resolution scaling at 100 % to preserve native aspect ratios, and disable any post‑process sharpening that could re‑introduce input lag.
Run a short practice round with the in‑game FPS counter visible. If you’re on a 240 Hz monitor, cap the frame rate just below the refresh rate (e.g., 235 FPS) to avoid micro‑stutter. Verify latency by checking the “Ping & Latency” overlay; you should see sub‑30 ms values. Tweak DLSS between “Performance” and “Balanced” if you notice visual artifacts, but never sacrifice the Ultra‑Low Latency mode—its single‑frame queue is the real competitive edge.
Step 5: Enable DLSS 3.5 in Call of Duty: Modern Warfare II
Launch Modern Warfare II and head straight to **Settings → Graphics**. Switch the preset to **Competitive** – this disables visual fluff like motion blur and depth‑of‑field while preserving the crispness you need for precise aim. Scroll down to the **DLSS** toggle and select **DLSS 3.5**. The UI will now show three mode choices: Quality, Balanced, and Performance. For most 1440p‑120 Hz rigs, the **Performance** preset delivers the best FPS‑to‑image‑quality ratio without sacrificing target visibility.
Next, enable **Frame Generation** under the same graphics menu. This activates NVIDIA’s AI‑generated frames, effectively doubling perceived smoothness when the GPU can’t keep up with the 120 Hz refresh. Pair it with **NVIDIA Reflex Low‑Latency Mode** set to **On + Boost** – the combination shaves off another 2‑3 ms of input lag. Remember to keep the **Render Resolution Scale** at 100 %; DLSS 3.5’s up‑scaling handles the heavy lifting, so you won’t lose detail on distant targets.
Finally, run the built‑in benchmark (or a 2‑minute deathmatch) and record your FPS and latency. Tom’s Hardware measured a **38 % FPS uplift** and a **9 ms latency reduction** at 1440p‑120 Hz with these exact settings, confirming the competitive edge. If you’re still shy of 120 FPS, drop the DLSS mode to **Balanced** and re‑test – the trade‑off is minimal for most maps, but it guarantees a smoother frame‑generation pipeline.
Step 6: Fine‑Tune Performance Settings
After DLSS 3.5 is enabled, the next lever to pull is the fine‑grained performance dial. Start by lowering the **Image Sharpness** slider to 0.5. NVIDIA’s own testing shows that 0.5 preserves enough edge definition for competitive shooters while letting the AI frame generator run at its maximum cadence, shaving off precious milliseconds of latency.<br/><br/>
Next, cap the GPU’s power draw at 250 W. On an RTX 4080 this limit trims peak temperature by roughly 10 ° C and keeps the card in its optimal boost window, all while retaining the 30‑45 % FPS uplift that DLSS 3.5 promises for fast‑paced shooters.<br/><br/>
- Open **NVIDIA Control Panel → Manage 3D settings**.
- Select **Power management mode → Prefer maximum performance**.
- Scroll to **Power limit** and type **250** (watts).
- Apply changes and restart the game to let the limiter take effect.
Finally, toggle **Frame Generation** on or off depending on your target latency budget. For 1‑v‑1 duels where every millisecond counts, disable it and raise the native resolution to 1440p @ 240 Hz. For larger team fights, keep it enabled and pair it with the 0.5 sharpness setting for a smoother visual flow. Test each configuration in the game’s built‑in benchmark or a private match, then lock in the combo that yields the highest consistent frame‑time while keeping input lag under 8 ms.
Conclusion & Next Steps
By locking in DLSS 3.5 across Apex Legends, Valorant, and Call of Duty: Modern Warfare II, competitive players are consistently hitting 1440p‑120 Hz with latency that stays under 20 ms in ranked matches. The community data shows a noticeable drop in frame‑time variance, translating to smoother aim and fewer surprise kills. In short, the technology delivers the millisecond‑level edge that high‑ELO shooters demand.
Keep the performance pipeline clean by checking for driver updates weekly. NVIDIA rolls out micro‑patches that fine‑tune the AI‑accelerated frame generation pipeline, often shaving a few milliseconds off latency. A quick reboot after each driver install ensures the new kernel modules are fully loaded and that your game profiles refresh correctly.
- Enable Windows Game Mode to prioritize CPU/GPU cycles for your active title.
- Set your network adapter to “Low Latency” mode and bind the game to a dedicated Ethernet connection when possible.
- Turn off background telemetry and Windows Update auto‑downloads during practice sessions.
- Adjust the in‑game mouse polling rate to 1000 Hz for the most responsive input.
With these final tweaks, you’ve squeezed every ounce of advantage from DLSS 3.5. Re‑test your settings after each change, record frame‑time graphs, and compare them against your baseline. The competitive edge isn’t a one‑time setup; it’s a habit of continual refinement. Stay sharp, stay updated, and let the AI do the heavy lifting while you focus on clutch plays.