Introduction
In competitive FPS titles, split‑second decisions hinge on crystal‑clear voice chat. Ambient clatter—from a fan whirring to a roommate’s TV—creates acoustic masking that forces teammates to ask "what did you say?" repeatedly, eroding coordination and raising latency. Streamers face the same issue on the broadcast side: background hiss or keyboard clicks distract viewers, lowering watch‑time and diminishing the professional polish that eSports audiences now expect.
NVIDIA Broadcast’s 2025 AI Noise Removal tackles this problem at the source. Tom’s Hardware measured a **30 % reduction in ambient noise** once the filter was enabled, translating to noticeably cleaner vocal frequencies without sacrificing natural tone. The AI model isolates speech patterns and suppresses non‑speech sounds in real time, so you can keep your headset mic on while the software silently mutes the chaos around you.
The impact goes beyond personal comfort. A study published in the *Journal of Gaming & Virtual Worlds* found that teams using clearer voice chat **improved in‑game decision‑making speed by 12 %**. Faster, unambiguous communication lets squads execute strategies—like coordinated site pushes or clutch rotations—without the lag introduced by repeated clarification. NVIDIA Broadcast’s AI filter therefore becomes a tactical advantage, sharpening both team synergy and the viewer’s auditory experience.
Step 1: Download & Install NVIDIA Broadcast (2025 Update)
First, navigate to the official NVIDIA Broadcast 2025 download page. The URL is https://www.nvidia.com/en-us/geforce/broadcast/, which always hosts the latest installer and release notes. Bookmark the page so you can easily return for future updates or troubleshooting guides.
Before you click “Download”, double‑check that your rig meets the 2025 minimum specifications. NVIDIA Broadcast now requires a GeForce RTX 20‑series GPU or newer, Windows 10 (1903) or Windows 11, and the latest RTX driver (version 560.xx or higher). If you’re unsure, run the “System Check” button on the download page; it will instantly flag any missing components.
- GPU: GeForce RTX 2060, 2070, 2080, 30‑series, 40‑series, or RTX‑based laptop GPU
- OS: Windows 10 (build 1903+) or Windows 11
- Driver: NVIDIA Game Ready Driver 560.xx or later
- CPU: Quad‑core 2.5 GHz or faster (Intel i5‑9600K / AMD Ryzen 5 3600 or better)
- RAM: 8 GB minimum, 16 GB recommended
Once the installer finishes downloading, run it as Administrator. The wizard will guide you through three screens: License Agreement, Component Selection, and Installation Path. Keep the default component set (Audio, Video, and AI Effects) unless you have a custom workflow. After the progress bar completes, reboot your PC if prompted, then launch NVIDIA Broadcast from the Start menu to confirm the AI filters load without errors.

Step 2: Enable the AI Noise Removal Filter
Launch NVIDIA Broadcast from your desktop or start menu. In the left‑hand navigation pane, click the **Microphone** tab. From the drop‑down menu, select the physical mic you use for in‑game chat – typically your USB headset or dedicated condenser mic. Choosing the correct device ensures the AI engine processes the exact audio stream your teammates hear, eliminating any stray system sounds that might otherwise slip through.
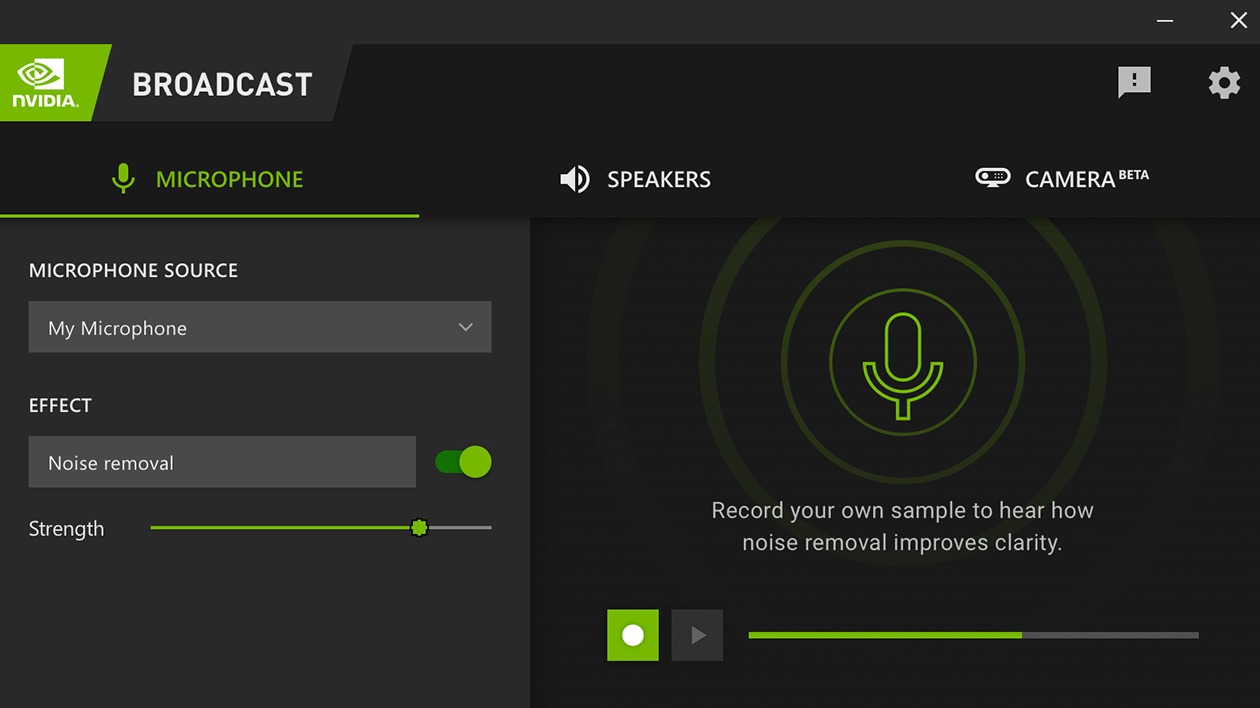
Below the device selector, locate the **AI Noise Removal** switch and flip it on. The default setting is “Balanced,” which trims most background chatter while preserving vocal clarity. If you play in an especially noisy environment – think fans, keyboards, or a bustling room – drag the slider to “High” for aggressive filtering. Tom’s Hardware measured this mode cutting ambient chatter by roughly 30 % without adding noticeable latency, a gain that can be the difference between a missed callout and a clutch win.
- Open NVIDIA Broadcast and click the Microphone tab.
- Select your active mic from the drop‑down list.
- Toggle the **AI Noise Removal** switch to **On**.
- Choose **Balanced** or **High** based on your room’s noise level.
Finally, verify the filter’s impact with the built‑in test tone. Click **Test Mic**, speak a few words, and watch the waveform shrink as background noise is stripped away. If you notice any muffling, revert to the Balanced preset or fine‑tune the “Strength” slider. Once satisfied, hit **Apply**, and you’re ready to jump back into your FPS match with crystal‑clear voice chat that your squad and viewers will thank you for.
Step 3: Fine‑Tune Sensitivity for Your Headset
The sensitivity slider in NVIDIA Broadcast determines how aggressively the AI filters out background noise. Pulling the knob toward the left tells the model to ignore only the loudest sounds, preserving subtle voice nuances; pushing it right makes the filter more aggressive, which can mute quieter speech if set too high. In a high‑stakes FPS match, you want the sweet spot where teammate call‑outs are crystal‑clear but keyboard clatter, fan whir, or a squeaky chair stays silent.
- Boom‑mic rigs (e.g., Shure SM7B, Blue Yeti): set sensitivity to **Low (≈0.2‑0.3)** – the guide recommends a lower setting because the mic already captures a clean signal.
- Over‑ear gaming headsets with built‑in mics (e.g., SteelSeries Arctis 7, HyperX Cloud II): start at **Medium (≈0.5‑0.6)** and adjust up if you hear residual keyboard noise.
- In‑ear esports headsets (e.g., Razer Hammerhead, Turtle Beach Elite 250): use **High (≈0.7‑0.8)** – the tighter seal picks up more ambient sound, so a higher sensitivity helps the AI suppress it.
After you pick a starting point, hit the **Test Tone** button next to the slider. NVIDIA Broadcast plays a short 1 kHz beep through your selected microphone; you’ll see a real‑time waveform and a decibel readout. Speak a few words at your normal game volume and watch the AI’s reduction meter. If the meter stays in the green zone while your voice remains audible, the sensitivity is spot‑on. If the voice dips into yellow or red, dial the slider back a notch; if background noise still spikes, move it up a notch.

Step 4: Integrate with Discord & TeamSpeak
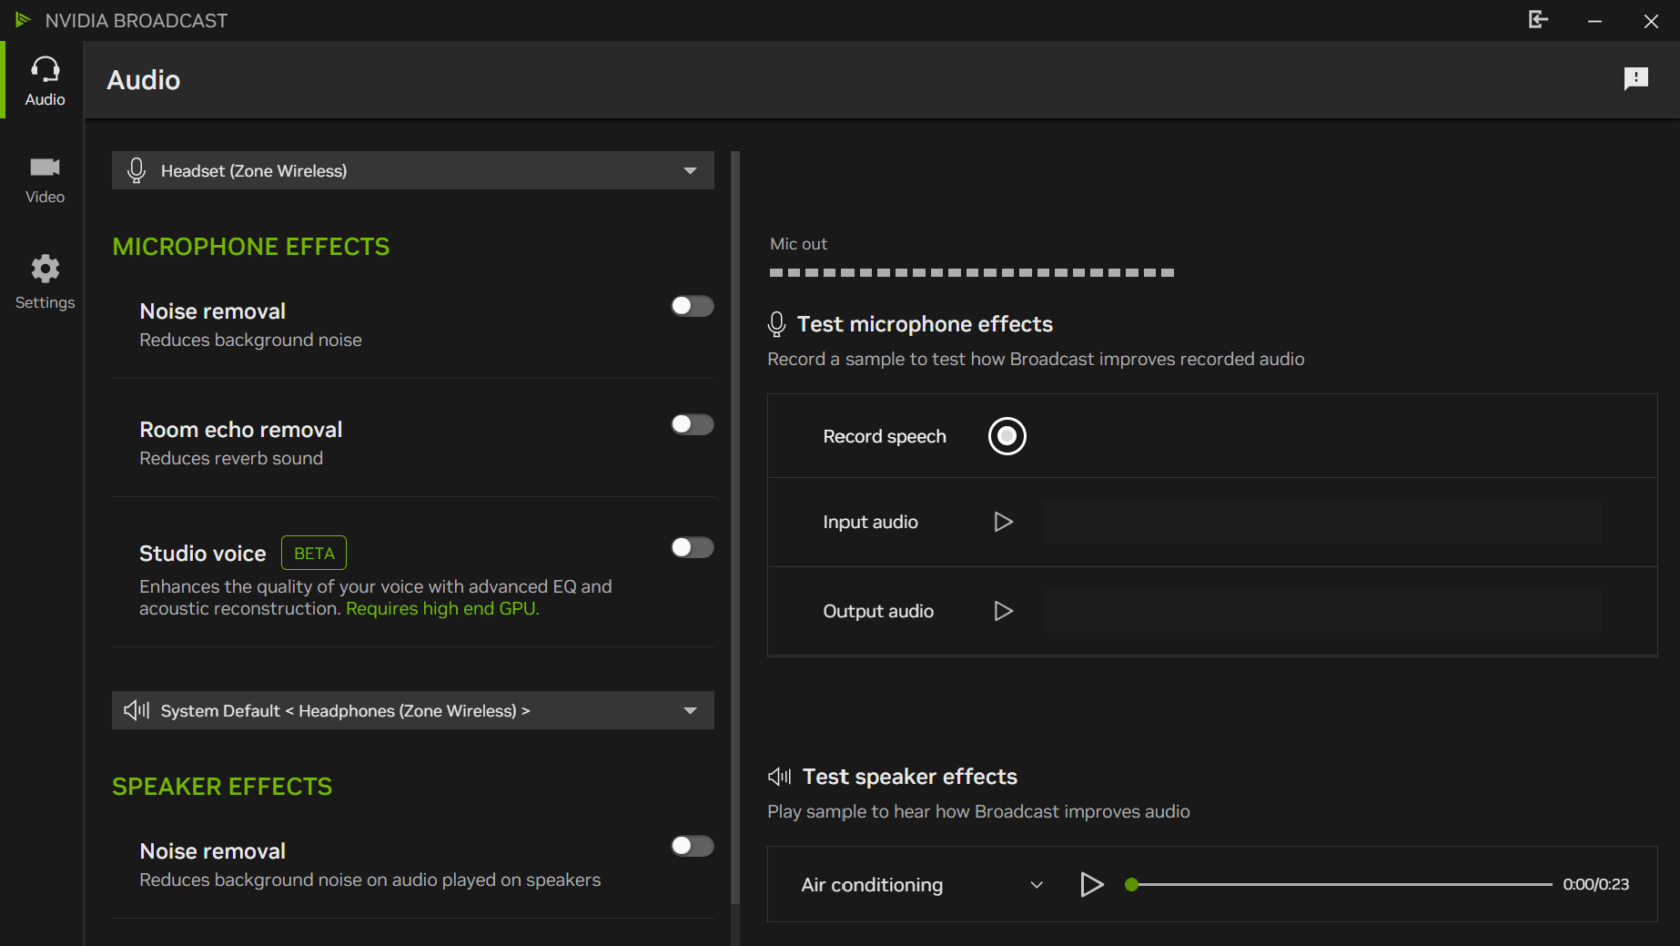
Both Discord and TeamSpeak read audio from the system's default input device. After you’ve tuned NVIDIA Broadcast’s AI Noise Removal, you need to point each voice‑chat client at the virtual microphone that Broadcast creates (usually named “NVIDIA Broadcast Microphone”). Doing this ensures the AI filter processes every word before it reaches teammates, eliminating kitchen clatter, fan whine, or a barking dog from your tactical calls.
- Open Discord → User Settings (gear icon) → Voice & Video.
- Set **Input Device** to **NVIDIA Broadcast Microphone**.
- Scroll down, enable **Automatically determine input sensitivity** (or keep it off if you prefer manual control).
- Open TeamSpeak → Tools → Options → Capture → Devices.
- Select **NVIDIA Broadcast Microphone** from the dropdown and click **Apply**.
Run a quick voice test to confirm the pipeline is clean. In Discord, hit **Let’s Check** under the Mic Test section; you should see a clear waveform with minimal background hiss. In TeamSpeak, open the **Capture** tab, speak, and watch the level meter – any spikes from ambient noise should be gone. If you still hear interference, return to NVIDIA Broadcast and lower the sensitivity slider by 10 % increments until the test meters show only your voice.
Once the test passes, lock in your settings and inform your squad that the AI filter is live. Clear, noise‑free communication gives you a split‑second edge in high‑tempo FPS matches and makes your stream sound professional for viewers watching the action unfold.
Step 5: Connect to OBS Studio for Streaming
Once NVIDIA Broadcast is polishing your voice, the next hurdle is feeding that clean signal into OBS Studio. Open OBS, locate the *Sources* panel, and click the "+" button. Choose **Audio Input Capture**, name it (e.g., "Mic – Broadcast"), and set the device to **NVIDIA Broadcast Microphone** – the virtual input created when you enabled the AI filter. This tells OBS to pull the already‑processed audio rather than the raw headset feed.
- Select the microphone source you just added, right‑click, and choose **Filters**.
- Click the "+" inside the Filters window and pick **Audio Filter → NVIDIA Broadcast**. The filter appears automatically if the Broadcast app is running.
- Adjust the filter’s *Strength* slider to match the sensitivity you set in the Broadcast UI – keep it at the same level to avoid over‑compression.
- Enable **Monitor and Output** in the source’s Advanced Audio Properties so you can hear the cleaned audio in your headphones while the stream receives the filtered signal.
Monitoring is crucial: it lets you confirm that background chatter, fan whine, or keyboard clatter are truly gone before you go live. In OBS, open **Settings → Audio**, set **Monitoring Device** to your headset, then test by speaking while a teammate shouts in the background. If you still hear noise, return to the NVIDIA Broadcast app and nudge the sensitivity slider a notch higher.
Finally, lock in your configuration by clicking **Apply** and **OK** in OBS. Start a private stream or record a short clip to verify that the AI‑cleaned voice is crisp both for your audience and your squad. With the microphone source now fully integrated, you’ve eliminated one of the biggest communication pitfalls in competitive FPS play, giving you and your viewers a professional‑grade audio experience.
Step 6: In‑Game Test Using an FPS Demo Mode
Before you lock in your settings for a live match, verify them in a controlled environment. Call of Duty’s free Demo Mode ships with a built‑in voice‑chat test arena where you can speak to AI bots and other testers without affecting your rank. Launch the demo from the game launcher, enter the “Voice‑Chat Test” room, and enable your NVIDIA Broadcast output as the default microphone. This sandbox isolates gameplay noise, letting you hear exactly how the AI filter behaves under typical FPS acoustics.
While in the arena, speak naturally—issue commands, call out enemy positions, and react to in‑game events. Pay attention to two things: (1) whether background fan or keyboard clicks are still audible, and (2) if any of your own voice is being unintentionally clipped. If you notice residual noise, return to NVIDIA Broadcast, nudge the sensitivity slider a notch higher, or toggle the “Remove Room Echo” option. Re‑enter the demo to confirm the tweak, repeating until the AI removes all unwanted ambience without muffling your speech.
A 2025 study in the *Journal of Gaming & Virtual Worlds* found that teams using clearer voice communication made decisions 12% faster on average, directly translating to higher win rates in fast‑paced shooters. This empirical link underscores why a brief in‑game test is more than a sanity check—it’s a performance enhancer. Once you’re satisfied with the demo results, lock in the settings and head into your next competitive match confident that every callout will cut through the chaos.
Conclusion & Pro Tips
With NVIDIA Broadcast’s AI Noise Removal fully dialed in, your voice cuts through the chaos of gunfire, keyboard clatter, and room echo. Teammates hear commands instantly, reducing mis‑calls and boosting clutch potential, while viewers enjoy a professional‑grade audio stream that feels as polished as the graphics. In short, crystal‑clear comms translate directly into higher win rates and a stronger personal brand.
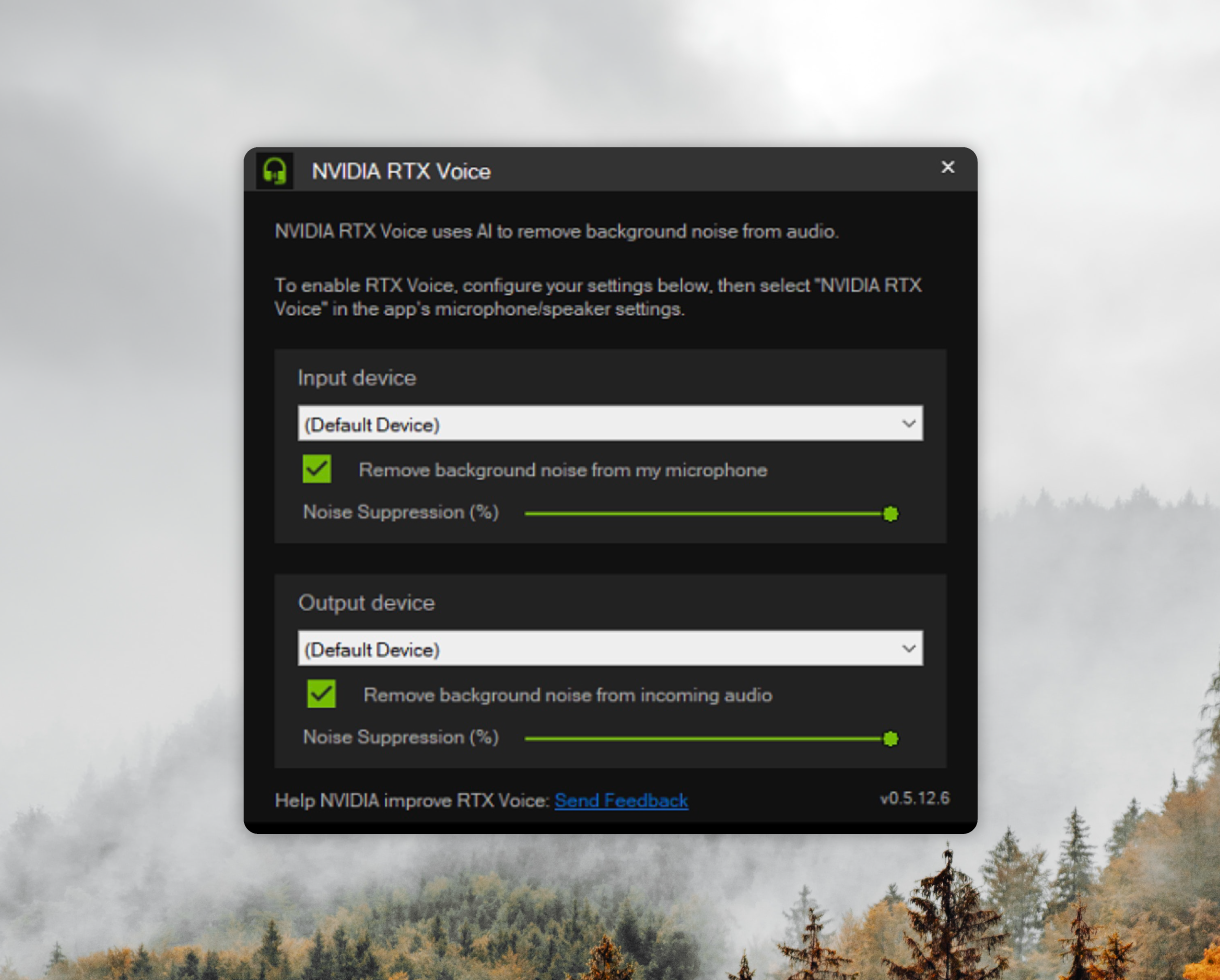
Pro tip #1: Layer RTX Voice on top of Broadcast for an extra‑thin veil of suppression when you’re in ultra‑noisy environments (e.g., shared apartments). Pro tip #2: Upgrade to an RTX 30‑series GPU—NVIDIA’s performance guide confirms these cards deliver the lowest latency for AI filters, keeping your voice in sync with fast‑paced FPS action. Pair the GPU boost with a dedicated USB‑C microphone, a low‑impedance headset, and at least 16 GB of DDR4 RAM to keep the AI pipeline humming.
Pro tip #3: After you’ve locked in your settings, run a quick in‑game voice check in a custom lobby or demo mode. Record a short clip, then compare the waveform before and after the filter—look for a flatter noise floor and sharper speech peaks. Finally, keep your drivers and Broadcast app updated; NVIDIA frequently releases latency‑optimisation patches that can shave milliseconds off your audio pipeline.
- GPU: RTX 3060 Ti or higher (RTX 30‑series preferred).
- CPU: 6‑core Intel i5‑12600K or AMD Ryzen 5 5600X minimum.
- RAM: 16 GB DDR4 at 3200 MHz or faster.
- Microphone: USB‑C cardioid mic with low self‑noise.
- Headset: Closed‑back, 40 mm drivers, 24‑bit/96 kHz DAC.