Introduction
In fast‑paced shooters like Valorant or Call of Duty, a split‑second can decide a round. When the stream latency stretches into seconds, the audience sees actions after they’ve already resolved, breaking immersion and rendering live commentary out of sync. Targeting an end‑to‑end delay under 30 ms keeps the viewer’s experience virtually identical to what the players see, preserving the adrenaline rush that fuels competitive eSports.
Most mainstream platforms default to a 2–6 second buffer. Twitch, for example, acknowledges this range as its standard latency tier, which is acceptable for casual gameplay but far too sluggish for tournament‑level analysis where commentators need to react in real time. That delay not only hampers strategic breakdowns but also gives away crucial information to opponents if the feed is rebroadcast elsewhere.
Professional eSports productions, however, routinely chase sub‑30 ms latency. This benchmark ensures that player actions, in‑game sound cues, and audience reactions are perfectly aligned, delivering a broadcast that feels live rather than delayed. Achieving that level of performance requires a purpose‑built workflow—OBS Studio paired with NDI for near‑instant video transport—so that every headshot and clutch play reaches the viewer the instant it happens.
Step 1: Set Up a Dedicated Capture PC with NDI
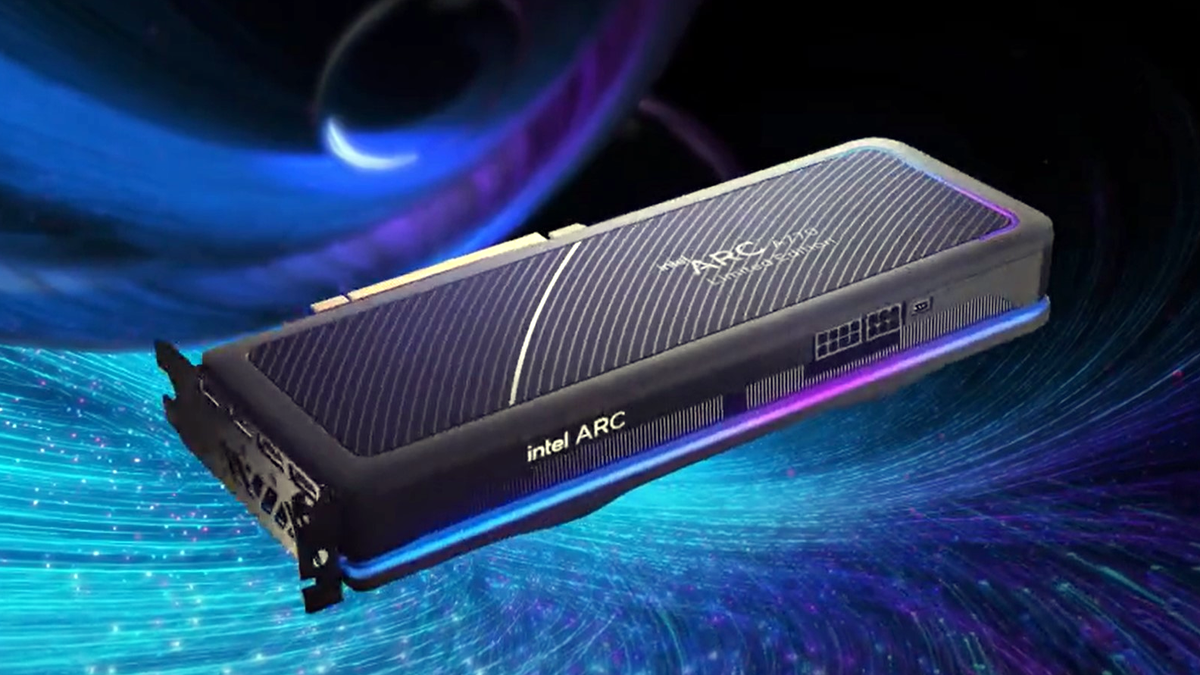
A separate capture rig isolates the heavy lifting of video encoding from your gaming machine, guaranteeing that frame‑rates stay buttery‑smooth during high‑stakes matches. For a lean yet powerful build, pair an Intel Core i5‑13600KF with 16 GB DDR5, a 500 GB NVMe SSD, and an Intel Arc A770 GPU. The A770’s XeSS upscaling lets you render at 720p 30 fps internally while outputting a clean 1080p 60 fps stream, shaving precious GPU cycles off the main game loop.
Next, install the free NewTek NDI Tools suite on the capture PC. The core components you need are NDI Scan Converter (to capture the desktop or HDMI source) and NDI Runtime (to enable other applications to receive the feed). After installing, launch NDI Scan Converter, select the game’s window, and enable “High‑Quality” mode to push 1080p 60 fps across a 1 Gbps LAN. In practice, NDI can deliver sub‑10 ms latency at these settings, which is fast enough to keep viewers in lockstep with the action.
- CPU: Intel Core i5‑13600KF (or comparable)
- GPU: Intel Arc A770 (XeSS enabled)
- RAM: 16 GB DDR5
- Storage: 500 GB NVMe SSD
- OS: Windows 11 Pro (latest updates)
- Network: Gigabit Ethernet card
- Software: NewTek NDI Tools (Scan Converter + Runtime)
Finally, add an NDI Source in OBS Studio on the capture PC. Choose “NDI Output” as the video source, set the resolution to 1920×1080, and tick “Low‑Latency Mode”. Open the companion OBS on your streaming PC, add the same NDI source, and run a quick 5‑second test clip. Use OBS’s Stats window to verify that the “Render Delay” stays under 30 ms; if it creeps higher, double‑check your Ethernet cable quality and ensure no other devices are saturating the network.
Step 2: Install and Configure OBS Studio for Low‑Latency
First, grab the latest OBS Studio build from the official website (obsproject.com) and run the installer. Once OBS launches, open **Settings → Advanced** and toggle the **Low latency mode** switch. Enabling this mode trims the output buffer to roughly 15 ms, a crucial reduction when you need sub‑30 ms end‑to‑end latency for competitive FPS streams.

Next, head to **Settings → Output → Streaming**. Choose a hardware encoder such as NVENC for minimal CPU load, then set a bitrate that matches your upload capacity (12 000 kbps is a solid baseline for 1080p @ 60 fps). Crucially, set the **Keyframe interval** to **2 seconds** – Twitch and most RTMP services recommend this value to keep the stream’s GOP short, which directly reduces latency spikes.
Finally, fine‑tune the video and network sections. In **Settings → Video**, lock the base and output resolution at 1920×1080 and the FPS at 60 to preserve the fast‑action feel of shooters. Under **Advanced → Network**, enable **Dynamic bitrate** and bind OBS to the capture PC’s IP if you’re using NDI. Keeping **Low latency mode** active here ensures the final packet queue stays under 15 ms, delivering a near‑real‑time experience for your viewers.
- Download OBS from obsproject.com and install.
- Enable Low latency mode in Settings → Advanced.
- Set Encoder to NVENC, Bitrate ≈12 000 kbps, Keyframe interval = 2 s.
- Video: 1920×1080 @ 60 fps; Output: Same resolution.
- Network: Turn on Dynamic bitrate and bind to capture PC’s IP.
Step 3: Integrate the NDI Source into OBS
With the capture rig already sending an NDI stream, launch OBS on your streaming PC. The OBS‑NDI plugin automatically adds a new source type called “NDI Source”. Click the + button, pick NDI Source, and select the stream name you configured on the capture machine. Because the plugin treats NDI like any other capture device, you can drag it onto any scene, resize, or stack filters just as you would with a webcam.
Now lock the source to the native resolution and frame rate of your game to avoid unnecessary scaling and keep latency at a minimum.
- Open the NDI Source properties and set ‘Resolution/FPS Type’ to ‘Custom’.
- Enter the exact width, height, and FPS (e.g., 1920 × 1080 @ 144 Hz).
- Enable the ‘Low‑Latency Mode’ toggle to prioritize frame delivery over buffering.
Finally, switch the encoder to a hardware‑accelerated option. In Settings → Output, change Output Mode to ‘Advanced’, then under the Streaming tab select ‘NVENC (new)’ for NVIDIA GPUs or ‘Intel Quick Sync’ for compatible CPUs. Hardware encoding pushes H.264 compression to the GPU, freeing the CPU and shaving processing delay to under 5 ms. Choose the ‘Low Latency P1’ preset, set a keyframe interval of 2 seconds, and pick a bitrate that matches your upload capacity (12 Mbps is a solid baseline for 1080p60). These settings lock in sub‑30 ms end‑to‑end latency while preserving the crisp visuals essential for competitive shooters.

Step 4: Optimize Network Settings (UDP, QoS, Bitrate)
Start by switching the NDI stream transport to UDP. Unlike TCP, UDP does not wait for lost packets to be retransmitted, which eliminates the latency spikes that can ruin a sub‑30 ms pipeline. For real‑time video, UDP is the de‑facto standard because it delivers frames as fast as the network allows, keeping your viewers in lockstep with the action.
Next, enable Quality of Service (QoS) on any managed switch between the capture PC and the streaming PC. Create a dedicated QoS class for NDI traffic and reserve at least 20 Mbps – the baseline bandwidth for a 1080p 60 fps stream at 30 Mbps plus headroom for packet loss. Cisco’s QoS guide shows how to map DSCP values to a guaranteed bandwidth, ensuring your video never gets throttled by other LAN chatter.
- Open your switch’s web UI and locate the QoS or Traffic Shaping section.
- Create a new traffic class named "NDI" and assign DSCP value 46 (EF) to it.
- Set a minimum bandwidth of 20 Mbps and enable priority queuing for the class.
Finally, dial in the NDI bitrate on the capture rig. A good rule of thumb is 3 Mbps per 720p 30 fps stream, 6 Mbps per 1080p 30 fps, and roughly double for 60 fps. In OBS, set the “Network → NDI Output → Bitrate” field to match your calculated requirement, then run a quick packet‑loss test with a tool like iperf3. Adjust upward only if you see compression artifacts; staying just above the minimum keeps latency low while preserving visual fidelity.

Step 5: Fine‑Tune Audio with NVIDIA Broadcast
Start by plugging a cardioid USB microphone into your streaming PC – the Blue Yeti is a favorite among eSports commentators because its three‑pattern switch captures clear, focused voice while rejecting room noise. Pair it with NVIDIA Broadcast, which processes the mic signal in real time, giving you studio‑grade clarity without the latency hit that plagues software EQs.
Install the latest NVIDIA Broadcast app, then open the "Microphone" tab. Select your Yeti as the input device, enable "Noise Removal," and optionally turn on "Room Echo Removal" for echo‑prone setups. Run the built‑in latency test – NVIDIA reports less than 5 ms added delay, which is well within the sub‑30 ms budget for competitive FPS streams.
- Open NVIDIA Broadcast → Microphone tab.
- Choose the Blue Yeti (or comparable cardioid USB mic) as the source.
- Toggle "Noise Removal" and adjust the strength slider to taste.
- Verify latency under 5 ms via the app’s diagnostics.
- Apply the processed audio as the default input in Windows.
Back in OBS, add the "Audio Input Capture" source and point it to the NVIDIA Broadcast virtual microphone. Disable any additional audio filters in OBS to avoid double‑processing. Use the "Sync Offset" field to fine‑tune the audio‑video relationship – keep the offset at 0 ms if the Broadcast latency truly stays under 5 ms, otherwise nudge it by a few milliseconds to lock commentary to the on‑screen action.
Step 6: Test and Verify Sub‑30 ms Latency
Before you hit “Go Live,” confirm that every link in your pipeline – from the capture PC’s NDI output to the viewer’s browser – stays under the 30 ms threshold. Even a perfectly tuned OBS setup can slip if a router throttles UDP packets or if the streaming platform adds buffering. A quick latency audit protects your audience from the dreaded “delay lag” that makes fast‑paced shooters feel unresponsive.
Start with Twitch’s Low‑Latency Test Suite. Log into your Twitch developer dashboard, enable the “Low‑Latency” flag for your channel, and open the test page. The suite streams a tiny 1 px‑wide video that measures round‑trip time and reports it in milliseconds. If the displayed value stays below 30 ms for at least three consecutive samples, you’ve met the target. Should the number spike, revisit your UDP QoS settings or reduce the NDI bitrate until the suite stabilizes.
If you want a viewer‑side sanity check, use the timer‑overlay method described by Streaming Media. On the capture PC, add a simple on‑screen clock (OBS Text (GDI+) works fine). Stream the feed to a second device on the same LAN, open the stream in a browser, and place a physical stopwatch next to the screen. Compare the two readings; the difference should be ≤ 30 ms. This manual test catches any hidden buffering introduced by CDN nodes outside Twitch’s own metrics.
- Enable Low‑Latency mode in your Twitch channel settings.
- Run the Twitch Low‑Latency Test Suite and log three consecutive sub‑30 ms readings.
- Overlay a live timer in OBS, view the stream on a second device, and verify the visual‑stopwatch delta.
- If any reading exceeds 30 ms, lower NDI bitrate, tighten QoS, or switch to a wired Ethernet link.
Conclusion & Next Steps
You’ve now built a full‑stack, sub‑30 ms pipeline: a dedicated capture PC streams raw game footage via NDI, OBS on the broadcast PC ingests that NDI source, network tweaks (UDP transport, QoS, and a tight bitrate ceiling) keep packets flowing without hiccups, and NVIDIA Broadcast polishes the audio. When you hit “Start Streaming,” each frame travels from the game engine to the viewer in barely a blink of an eye.
Don’t stop at 1080p @ 60 fps. Once the low‑latency foundation is solid, push the envelope by testing 1440p or even 4K at 120 fps—just remember that each extra pixel adds processing time and bandwidth demand. Incrementally raise resolution and frame rate while monitoring the end‑to‑end latency with a handheld stopwatch or a software timer; if you breach the 30 ms threshold, dial back the bitrate or enable hardware‑accelerated encoding (NVENC/AMD VCE) to stay in the sweet spot.
The OBS Community Forum is a goldmine for fine‑tuning these settings. Threads in the Low‑Latency category share real‑world configurations, custom NDI plugins, and troubleshooting tips that can shave precious milliseconds off your stream. Dive into the discussions, post your own results, and collaborate with other competitive shooters who are also chasing that razor‑thin latency edge.